OAuth Grant Flow
This document will guide you through the steps to authenticate and authorise your application with Zepto using OAuth.
This document will guide you through the steps to authenticate and authorise your application with Zepto using OAuth.

Important NoteThere is currently a known issue when a new scope is added/updated, the OAuth client app is unable to access the scope and get 403 error. We are working to fix this.
Meanwhile, if you need to add new scope to your existing app or experiencing any issue, please reach out to our support team.
Zepto uses OAuth2 over https to manage authentication and authorisation.
OAuth2 is a protocol that lets external applications request permission from another Zepto user to send requests on their behalf without getting their password.
This is preferred over Basic Authentication because access tokens can be limited by scope and can be revoked by the user at any time.
New to OAuth2? DigitalOcean has a fantastic 5 minute introduction to OAuth2.
We currently support the authorisation code and refresh token grants.
Refresh Token Grant
curl -F "grant_type=refresh_token" \
      -F "client_id={{oauth2_application_id}}" \
      -F "client_secret={{oauth2_application_secret }}" \
      -F "refresh_token={{refresh_token}}" \
      -X POST https://go.sandbox.zeptopayments.com/oauth/token
{
"access_token": "ad0b5847cb7d254f1e2ff1910275fe9dcb95345c9d54502d156fe35a37b93e80",
"token_type": "bearer",
"expires_in": 7200,
"refresh_token": "cc38f78a5b8abe8ee81cdf25b1ca74c3fa10c3da2309de5ac37fde00cbcf2815",
"scope": "public"
}When using the authorisation code grant above, Zepto will return a refresh token along with the access token. Access tokens are short lived and last 2 hours but refresh tokens do not expire.
When the access token expires, instead of sending the user back through the authorisation flow you can use the refresh token to retrieve a new access token with the same permissions as the old one.
NOTE: The refresh_token gets regenerated and sent alongside the new
access_token. In other words,refresh_tokensare single use so you'll want to store the newly generatedrefresh_tokeneverytime you use it to get a newaccess_token
Scopes define the level of access granted via the OAuth2 authorisation process. As a best practice, only use the scopes your application will require.
| Scope | Description |
|---|---|
| public | View user's public information |
| agreements | Manage user's Agreements |
| bank_accounts | Manage user's Bank Accounts |
| bank_connections | Manage user's Bank Connections |
| contacts | Manage user's Contacts |
| open_agreements | Manage user's Open Agreements |
| payments | Manage user's Payments |
| payment_requests | Manage user's Payment Requests |
| refunds | Manage user's Refunds |
| transfers | Manage user's Transfers |
| transactions | Access user's Transactions |
| webhooks | Manage user's Webhook events |
| offline_access | Create non-expiring access tokens for user |
| pay_to_agreements | Manage PayTo Agreements |
| pay_to_amendment_recalls | Manage PayTo Agreement Amendment/Recalls |
| pay_to_amendments | Manage PayTo Agreement Amendment |
| pay_to_cancellations | Manage PayTo Agreement Cancellations |
| pay_to_payments | Manage PayTo Payments |
| pay_to_reactivations | Manage PayTo Agreement Reactivations |
| pay_to_refunds | Manage PayTo Refunds |
| pay_to_suspensions | Manage PayTo Agreement Suspensions |
| pay_to_aliases | Manage PayTo Aliases |
| clients | Register sub merchant data to Zepto via API |
| cop_account_validations | Zepto Validate (Confirmation of Payee) |
Please use
offline_accesswith discretion, as you'll have no direct way to invalidate the token. Please contact Zepto immediately if any token may have potentially been compromised.
Once you've got your account up and running, sign in and create an OAuth2 profile for your application:
| Parameter | Description |
|---|---|
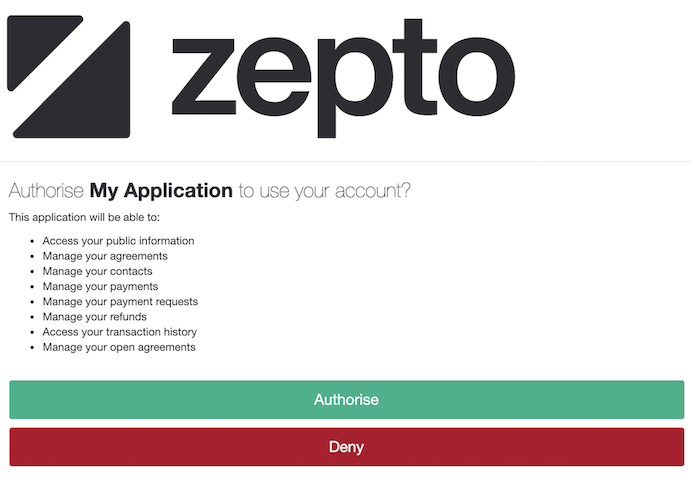
| Name | The name of your application. When using the Authorisation Grant Flow, users will see this name as the application requesting access to their account. |
| Redirect URI | Set this to your application's endpoint charged with receiving the authorisation code. |
Construct the initial URL the user will need to visit in order to grant your application permission to act on his/her behalf. The constructed URL describes the level of permission (scope), the application requesting permission (client_id) and where the user gets redirected once they've granted permission (redirect_uri).
The URL should be formatted to look like this:
https://go.sandbox.zeptopayments.com/oauth/authorize?response_type=code&client_id={client_id}&redirect_uri={redirect_uri}&scope={scope}
| Parameter | Description |
|---|---|
| response_type | Always set to code |
| client_id | This is your Application ID as generated when you registered your application with Zepto |
| redirect_uri | URL where the user will get redirected along with the newly generated authorisation code |
| scope | The scope of permission you're requesting |

redirect_uri along with the code query parameter as the authorisation code.https://go.sandbox.zeptopayments.com/oauth/tokenNote: The authorisation code is a ONE-TIME use code. It will not work again if you try to POST it a second time.
| Parameter | Description |
|---|---|
| grant_type | Set to authorization_code |
| client_id | This is your Application ID as generated when you registered your application with Zepto |
| client_secret | This is your Secret as generated when you registered your application with Zepto |
| code | The authorisation code returned with the user (ONE-TIME use) |
| redirect_uri | Same URL used in step 3 |
Now that you have an access token and refresh token, you can interact with the Zepto API as the user related to the access token.
To do so, you must simply append the access token to the header of any API request: Authorization: Bearer {access_token}
Here's a quick demo video on creating an OAuth grant flow using Postman app:
Updated 12 days ago