
Zepto API
Zepto allows you to make, get and manage payments using nothing but bank accounts.
Zepto
Zepto allows you to make, get and manage payments using nothing but bank accounts.
It is important to understand that there are 2 main ways Zepto can be used for maximum flexibility:
- Between Zepto accounts.
- Between a Zepto account and anyone.
Due to the above, certain endpoints and techniques will differ slightly depending on who you are interacting with. You can find more on this in the Making payments and Getting paid guides.
And for all kinds of How To's and Recipes, head on over to our Help Guide.
Conventions
- Authentication is performed using OAuth2. See the Get started and Authentication & Authorisation guides for more.
- All communication is via
httpsand supports onlyTLSv1.2. - Production API:
https://api.zeptopayments.com/. - Production UI:
https://go.zeptopayments.com/. - Sandbox API:
https://api.sandbox.zeptopayments.com/. - Sandbox UI:
https://go.sandbox.zeptopayments.com/. - Data is sent and received as JSON.
- Clients should include the
Accepts: application/jsonheader in their requests. - Currencies are represented by 3 characters as defined in ISO 4217.
- Dates & times are returned in UTC using ISO 8601 format with second accuracy. With requests, when no TZ is supplied, the configured TZ of the authenticated user is used, or
Australia/Sydneyif no TZ is configured. - Amounts are always in cents with no decimals unless otherwise stated.
- Zepto provides static public IP addresses for all outbound traffic, including webhooks.
- Sandbox IP:
13.237.142.60 - Production IPs:
52.64.11.67and13.238.78.114
- Sandbox IP:
System Status
Check the platform status, or subscribe to receive notifications at status.zeptopayments.com.
If you would like to check platform status programmatically, please refer to status.zeptopayments.com/api.
Breaking Changes
A breaking change is assumed to be:
- Renaming a parameter (request/response)
- Removing a parameter (request/response)
- Changing a parameter type (request/response)
- Renaming a header (request/response)
- Removing a header (request/response)
- Application of stricter validation rules for request parameters
- Reducing the set of possible enumeration values for a request
- Changing a HTTP response status code
We take backwards compatibility very seriously, and will make every effort to ensure this never changes. In the unfortunate (and rare) case where a breaking change can not be avoided, these will be announced well in
advance, enabling a transition period for API consumers.
The following are not assumed to be a breaking change and must be taken into account by API consumers:
- Addition of optional new parameters in request
- Addition of new parameters in response
- Addition of new headers in request
- Reordering of parameters in response
- Softening of validation rules for request parameters
- Increasing the set of possible enumeration values
In the case of non breaking changes, a transition period may not be provided, meaning the possibility of such changes occurring must be considered in consumers' logic so as not to break any integrations with both API and Webhooks.
Guides
Try it out
The best way to familiarise yourself with our API is by interacting with it.
We've preloaded a collection with all our endpoints for you to use in Postman.
Before you start, import a copy of our API collection:

Okay, let's get things setup!
- Create a Zepto account
If you haven't already, you'll want to create a sandbox Zepto account at https://go.sandbox.zeptopayments.com - Register your application with Zepto
Sign in and create an OAuth2 application: https://go.sandbox.zeptopayments.com/oauth/applications.
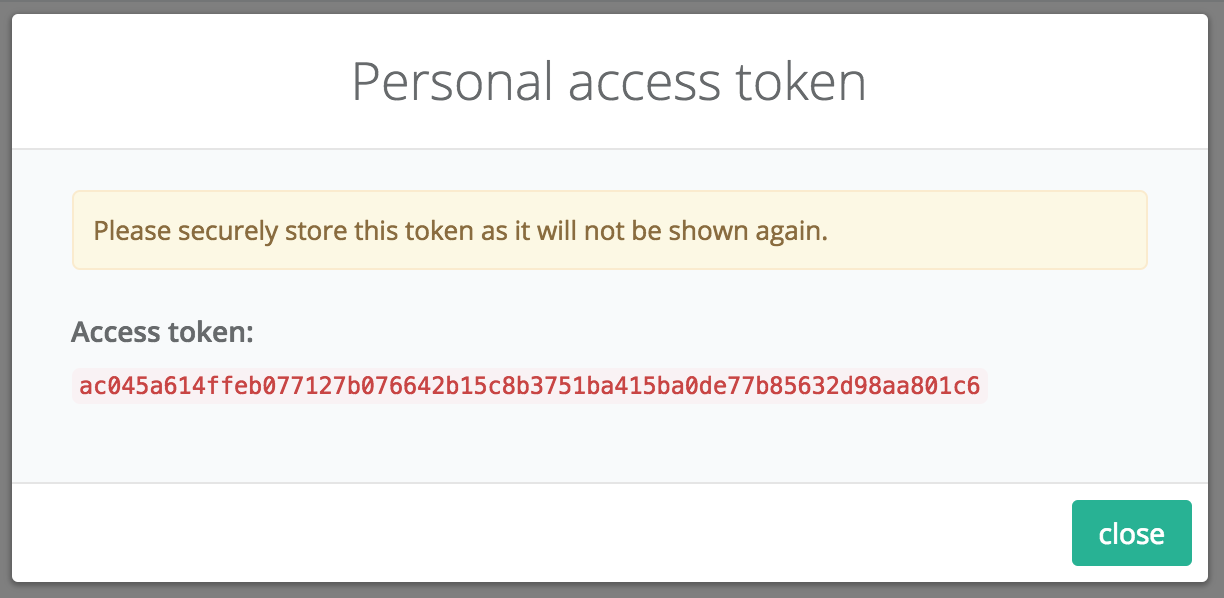
- Generate personal access tokens
The quickest way to access your Zepto account via the API is using personal access tokens. Click on your newly created application from your [application list](https://go.sandbox.zeptopayments.com/oauth applications) and click on
(You'll have the option to give the token a title)NOTE: Please note that personal access tokens do not expire.
- Use personal access token in Postman
You can use thisaccess_tokento authorise any requests to the Zepto API in Postman by choosing the Bearer Token option under the Authorization tab.
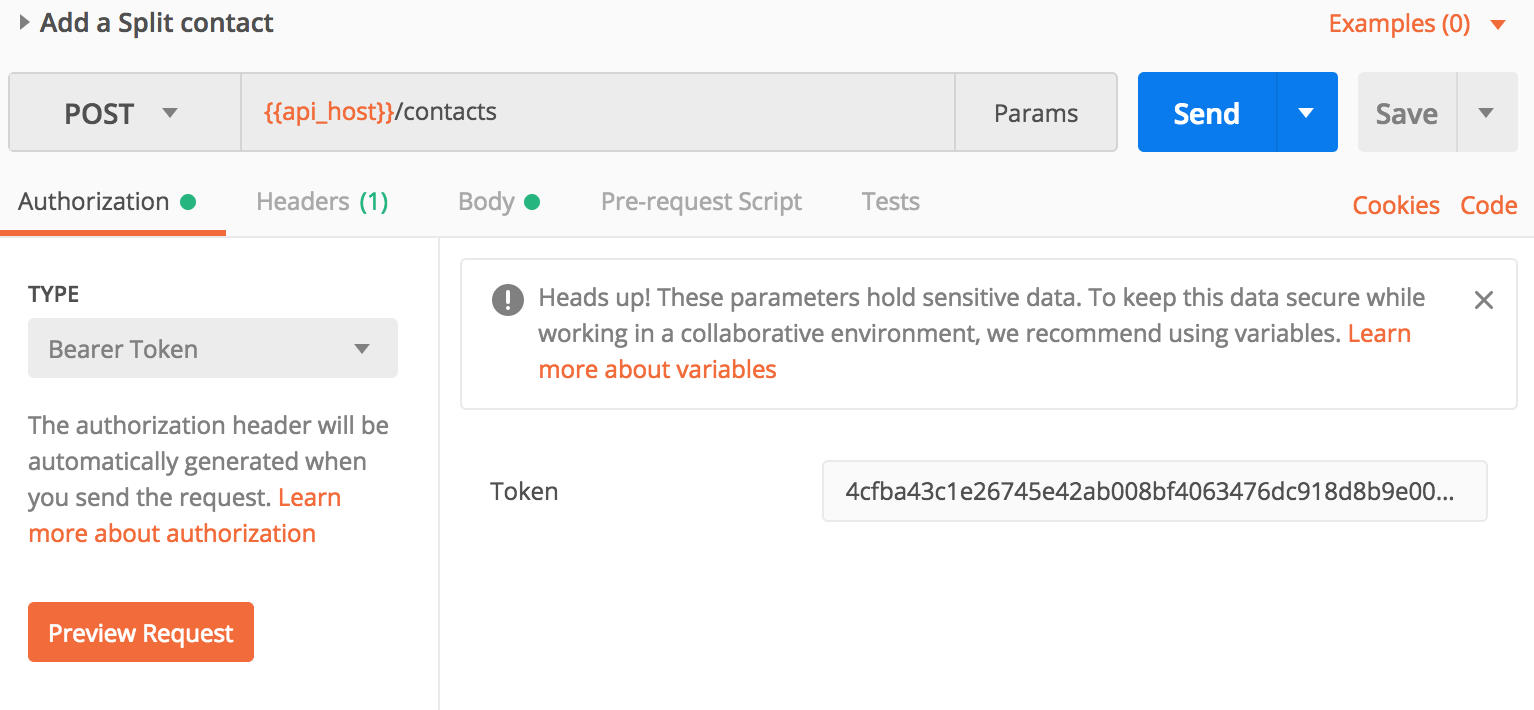
- Make an API request!
You are now ready to interact with your Zepto account via the API! Go ahead and send a request using Postman.
Get started
This guide will help you setup an OAuth2 app in order to get authenticated & authorised to communicate with the Zepto API.
Before you start:
- We use the term user below but the user can be a third party or the same user that owns the OAuth2 application.
- As noted below, some access tokens expire every 2 hours. To get a new access token use the refresh grant strategy to swap a refresh token for a new access token.
- Create a Zepto account
If you haven't already, you'll want to create a sandbox Zepto account at https://go.sandbox.zeptopayments.com. - Choose authentication method
All requests to the Zepto API require anaccess_tokenfor authentication. There are two options for obtaining these tokens, the correct option will depend on your use case:- Personal access token If you only need to access your own Zepto account via the API, then using personal access tokens are the most straight-forward way. Refer to Personal access token to setup. These tokens do not expire so no refreshing is required.
- OAuth grant flow When you require your application to act on behalf of other Zepto accounts you'll need to implement the OAuth grant flow process. Refer to OAuth grant flow guide to setup. There is also an OAuth grant flow tutorial. These access tokens expire every 2 hours, unless the
offline_accessscope is used in which case the tokens will not expire.
Personal access token
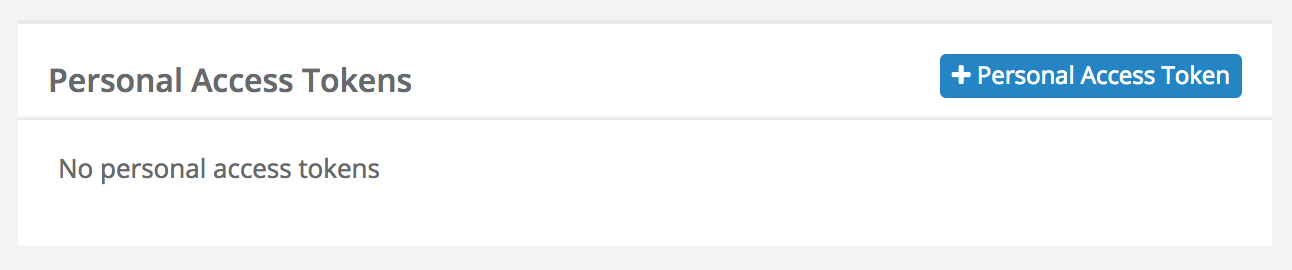
If you're looking to only access your own account via the API, you can generate a personal access token from the UI. These tokens do not expire, but can be deleted. To do this:
- Sign in to your Zepto account and create an application if you haven't already. Click on your application from your application list and click on Personal access.
(You'll have the option to give the token a title)
- Now that you have an
access_tokenyou can interact with your Zepto account via the API.
To do so, you must simply append the access token to the header of any API request:Authorization: Bearer {access_token}
OAuth grant flow
-
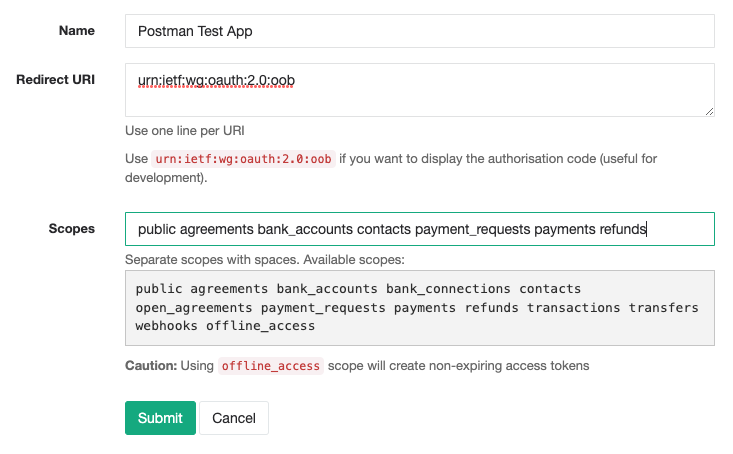
Register your application with Zepto
Once you've got your account up and running, sign in and create an OAuth2 profile for your application: https://go.sandbox.zeptopayments.com/oauth/applications
Parameter Description Name The name of your application. When using the Authorisation Grant Flow, users will see this name as the application requesting access to their account. Redirect URI Set this to your application's endpoint charged with receiving the authorisation code. -
Obtain an authorisation code
Construct the initial URL the user will need to visit in order to grant your application permission to act on his/her behalf. The constructed URL describes the level of permission (
scope), the application requesting permission (client_id) and where the user gets redirected once they've granted permission (redirect_uri).The URL should be formatted to look like this:
https://go.sandbox.zeptopayments.com/oauth/authorize?response_type=code&client_id={client_id}&redirect_uri={redirect_uri}&scope={scope}Parameter Description response_typeAlways set to codeclient_idThis is your Application IDas generated when you registered your application with Zeptoredirect_uriURL where the user will get redirected along with the newly generated authorisation code scopeThe scope of permission you're requesting -
Exchange the authorisation code for an access token
When the user visits the above-mentioned URL, they will be presented with a Zepto login screen and then an authorisation screen:
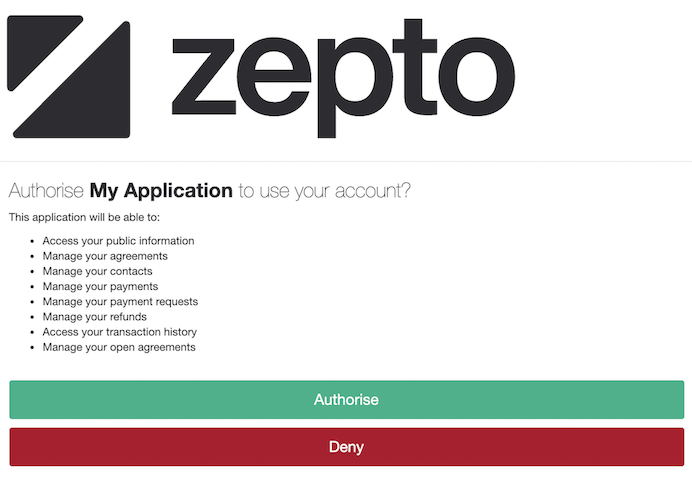
After the user has authorised your application, they will be returned to your application at the URL specified in
redirect_urialong with thecodequery parameter as the authorisation code.Finally, the authorisation code can then be exchanged for an access token and refresh token pair by POSTing to:
https://go.sandbox.zeptopayments.com/oauth/tokenNote The authorisation code is a ONE-TIME use code. It will not work again if you try to POST it a second time.
Parameter Description grant_typeSet to authorization_codeclient_idThis is your Application IDas generated when you registered your application with Zeptoclient_secretThis is your Secretas generated when you registered your application with ZeptocodeThe authorisation code returned with the user (ONE-TIME use) redirect_uriSame URL used in step 3 -
Wrap-up
Now that you have an access token and refresh token, you can interact with the Zepto API as the user related to the access token.
To do so, you must simply append the access token to the header of any API request:Authorization: Bearer {access_token}
OAuth grant flow tutorial
The OAuth grant flow process is demonstrated using Postman in the steps below.
Before you start, load up our API collection:
A screencast of this process is also available:
https://vimeo.com/246203244.
-
Create a Zepto account
If you haven't already, you'll want to create a sandbox Zepto account at https://go.sandbox.zeptopayments.com
-
Register your application with Zepto
Sign in and create an OAuth2 application: https://go.sandbox.zeptopayments.com/oauth/applications.
Use the special Postman callback URL:
https://www.getpostman.com/oauth2/callback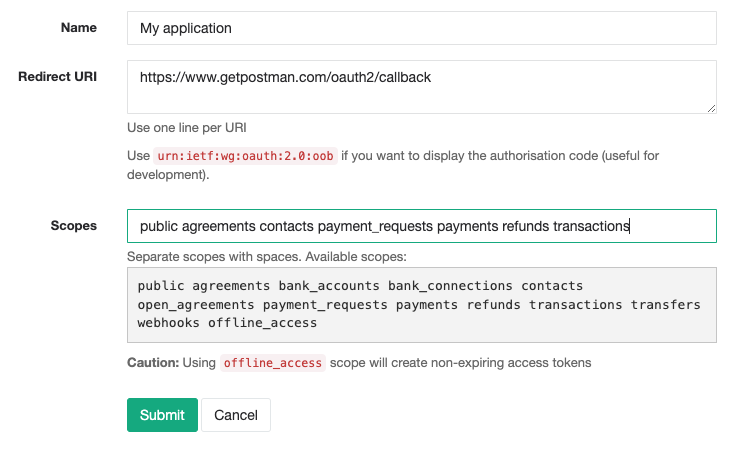
-
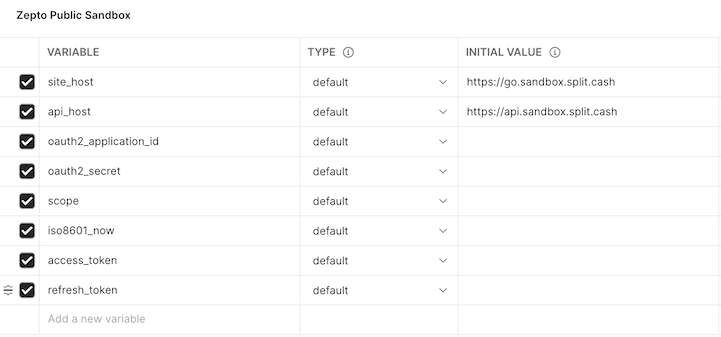
In Postman, setup your environment variables
We've included the Zepto Public Sandbox environment to get you started. Select it in the top right corner of the window then click the
 icon and click edit.
Using the details from the OAuth2 app you created earlier, fill in the oauth2_application_id & oauth2_secret fields.
-
Setup the authorization
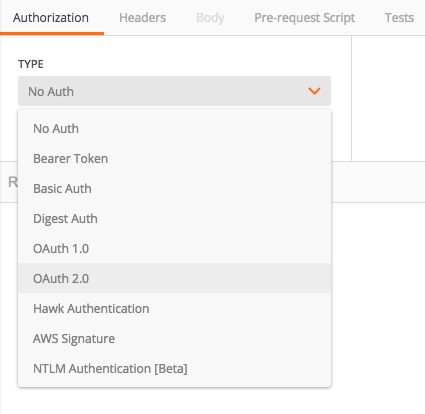
Click on the Authorization tab and select OAuth 2.0
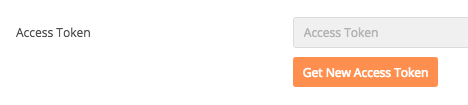
Click the Get New Access Token button
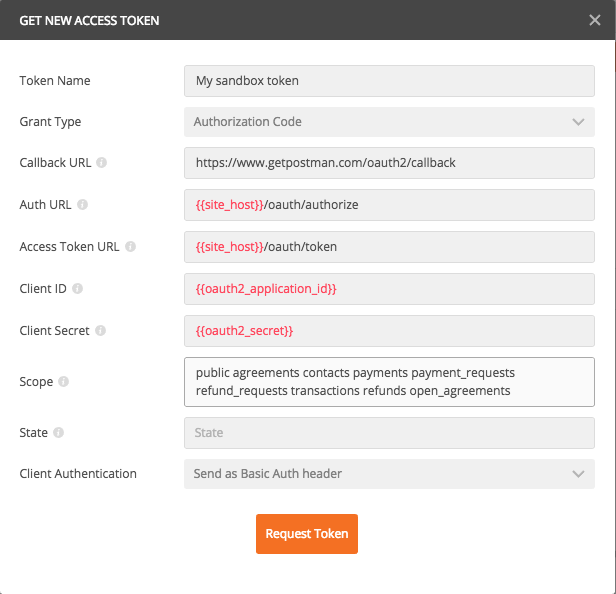
Fill in the OAuth2 form as below:
-
Get authorised
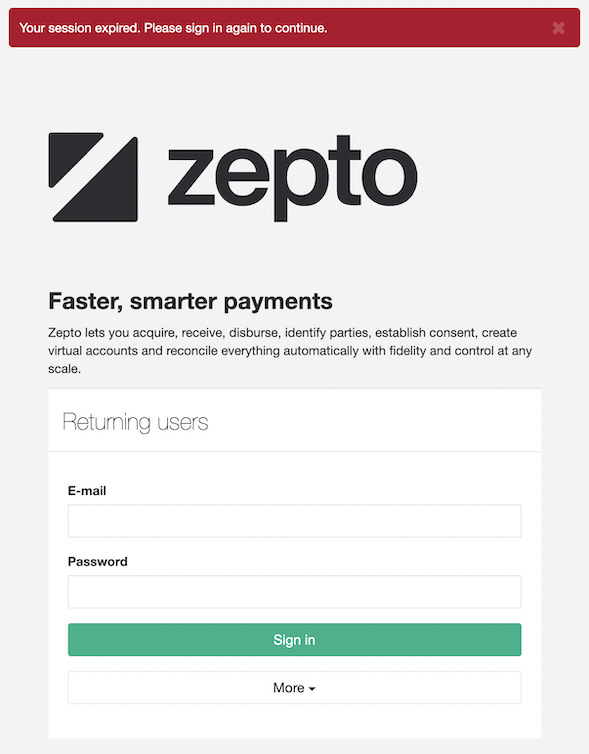
Click Request Token and wait a few seconds and a browser window will popup
Sign in with your Zepto account (or any other Zepto account you want to authorise).
Click Authorise to allow the app to access the signed in account. Once complete, Postman will automatically exchange the authorisation code it received from Zepto for the
access_token/refresh_tokenpair. It will then store theaccess_token/refresh_tokenfor you to use in subsequent API requests. Theaccess_tokeneffectively allows you to send requests via the API as the user who provided you authorisation. -
You're now ready to use the API
Select an endpoint from the Zepto collection from the left hand side menu. Before you send an API request ensure you select your access token and Postman will automatically add it to the request header.
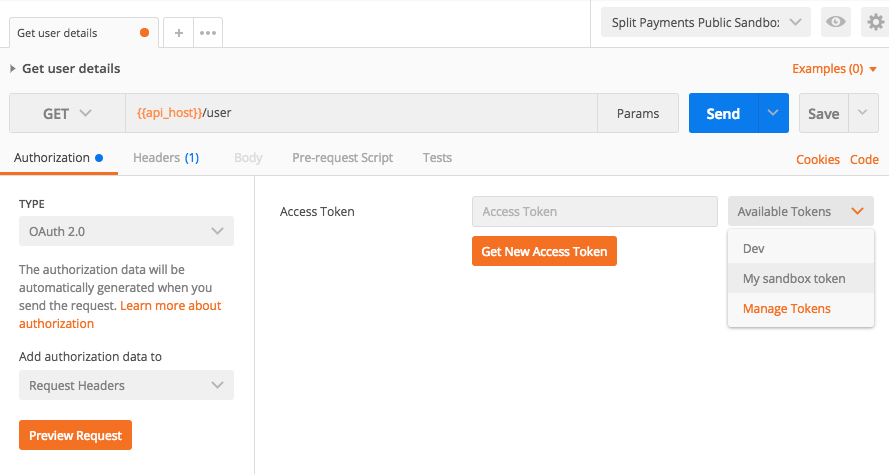
NOTE: Remember to select the access token everytime you try
a new endpoint. Have fun!
Authentication and Authorisation
Zepto uses OAuth2 over https to manage authentication and authorisation.
OAuth2 is a protocol that lets external applications request permission from another Zepto user to send requests on their behalf without getting their password.
This is preferred over Basic Authentication because access tokens can be limited by scope and can be revoked by the user at any time.
New to OAuth2? DigitalOcean has a fantastic 5 minute introduction to OAuth2.
We currently support the authorisation code and refresh token grants.
Authorisation Code Grant
This type of grant allows your application to act on behalf of a user. If you've ever used a website or application with your
Google, Twitter or Facebook account, this is the grant being used.
See the Get Started guide for step by step details on how to use this grant.
Refresh Token Grant
Code sample
curl -F "grant_type=refresh_token" \
      -F "client_id={{oauth2_application_id}}" \
      -F "client_secret={{oauth2_application_secret }}" \
      -F "refresh_token={{refresh_token}}" \
      -X POST https://go.sandbox.zeptopayments.com/oauth/token
Example response
{
  "access_token": "ad0b5847cb7d254f1e2ff1910275fe9dcb95345c9d54502d156fe35a37b93e80",
  "token_type": "bearer",
  "expires_in": 7200,
  "refresh_token": "cc38f78a5b8abe8ee81cdf25b1ca74c3fa10c3da2309de5ac37fde00cbcf2815",
  "scope": "public"
}
When using the authorisation code grant above, Zepto will return a refresh token along with the access token. Access tokens are short lived and last 2 hours but refresh tokens do not expire.
When the access token expires, instead of sending the user back through the authorisation flow you can use the refresh token to retrieve a new access token with the same permissions as the old one.
NOTE:
Therefresh_tokengets regenerated and sent alongside the newaccess_token. In other words,refresh_tokens are single use so you'll want to store the newly generatedrefresh_tokeneverytime you use it to get a newaccess_token
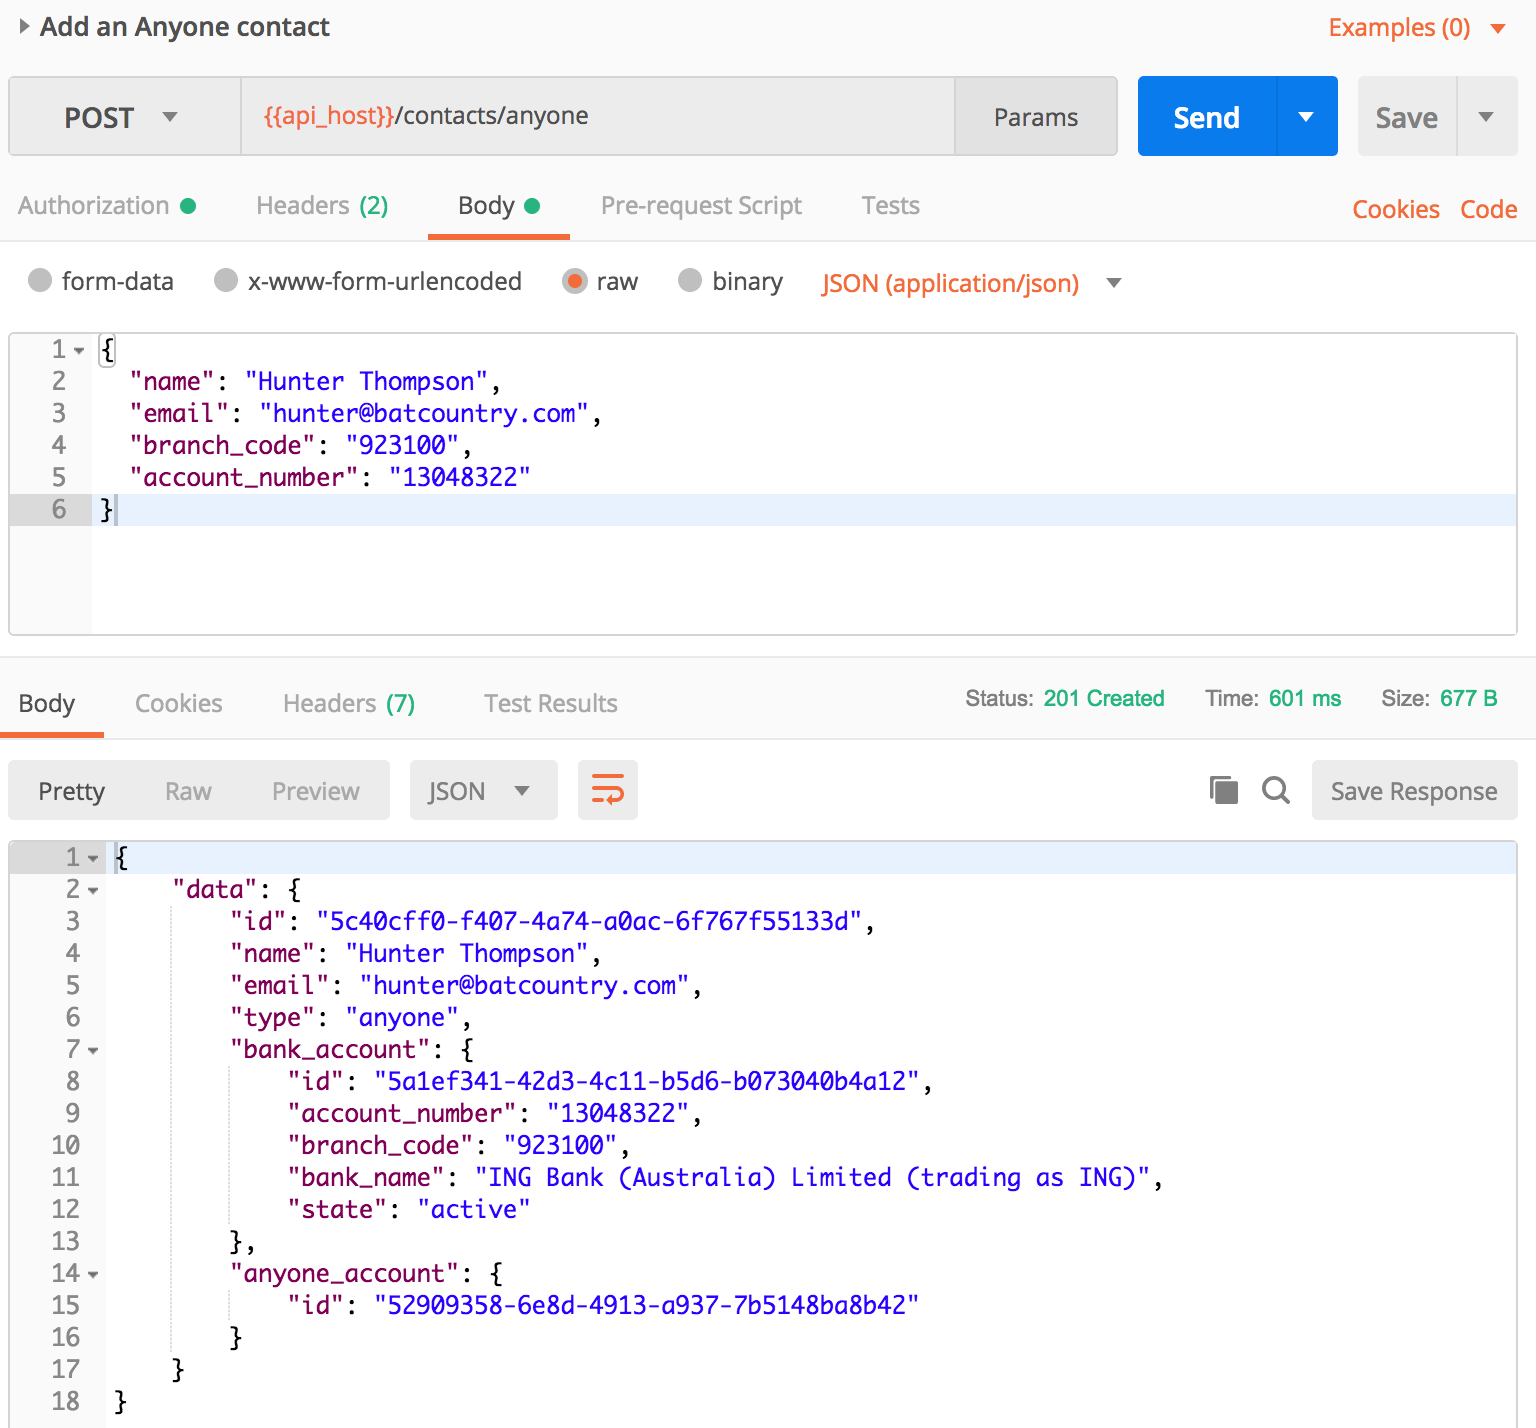
Making payments
In order to payout funds, you'll be looking to use the Payments endpoint. Whether you're paying out another Zepto account holder or anyone, the process is the same:
-
Add the recipient to your Contact list.
-
Make a Payment to your Contact.
Common use cases:
-
Automated payout disbursement (Referal programs, net/commission payouts, etc...)
-
Wage payments
-
Gig economy payments
-
Lending
Getting paid
POSTing a Payment Request
Provides the ability to send a Payment Request (get paid) to any Contact that has an accepted Agreement in place.
To send a Payment Request to a Contact using the API, you must first have an accepted Agreement with them.
To do so, you can send them an Open Agreement link or Unassigned Agreement link for them to Select & verify their bank account and accept the Agreement.
Having this in place will allow any future Payment Requests to be automatically approved and processed as per the Agreement terms.
Common use cases:
-
Subscriptions
-
On-account balance payments
-
Bill smoothing
-
Repayment plans
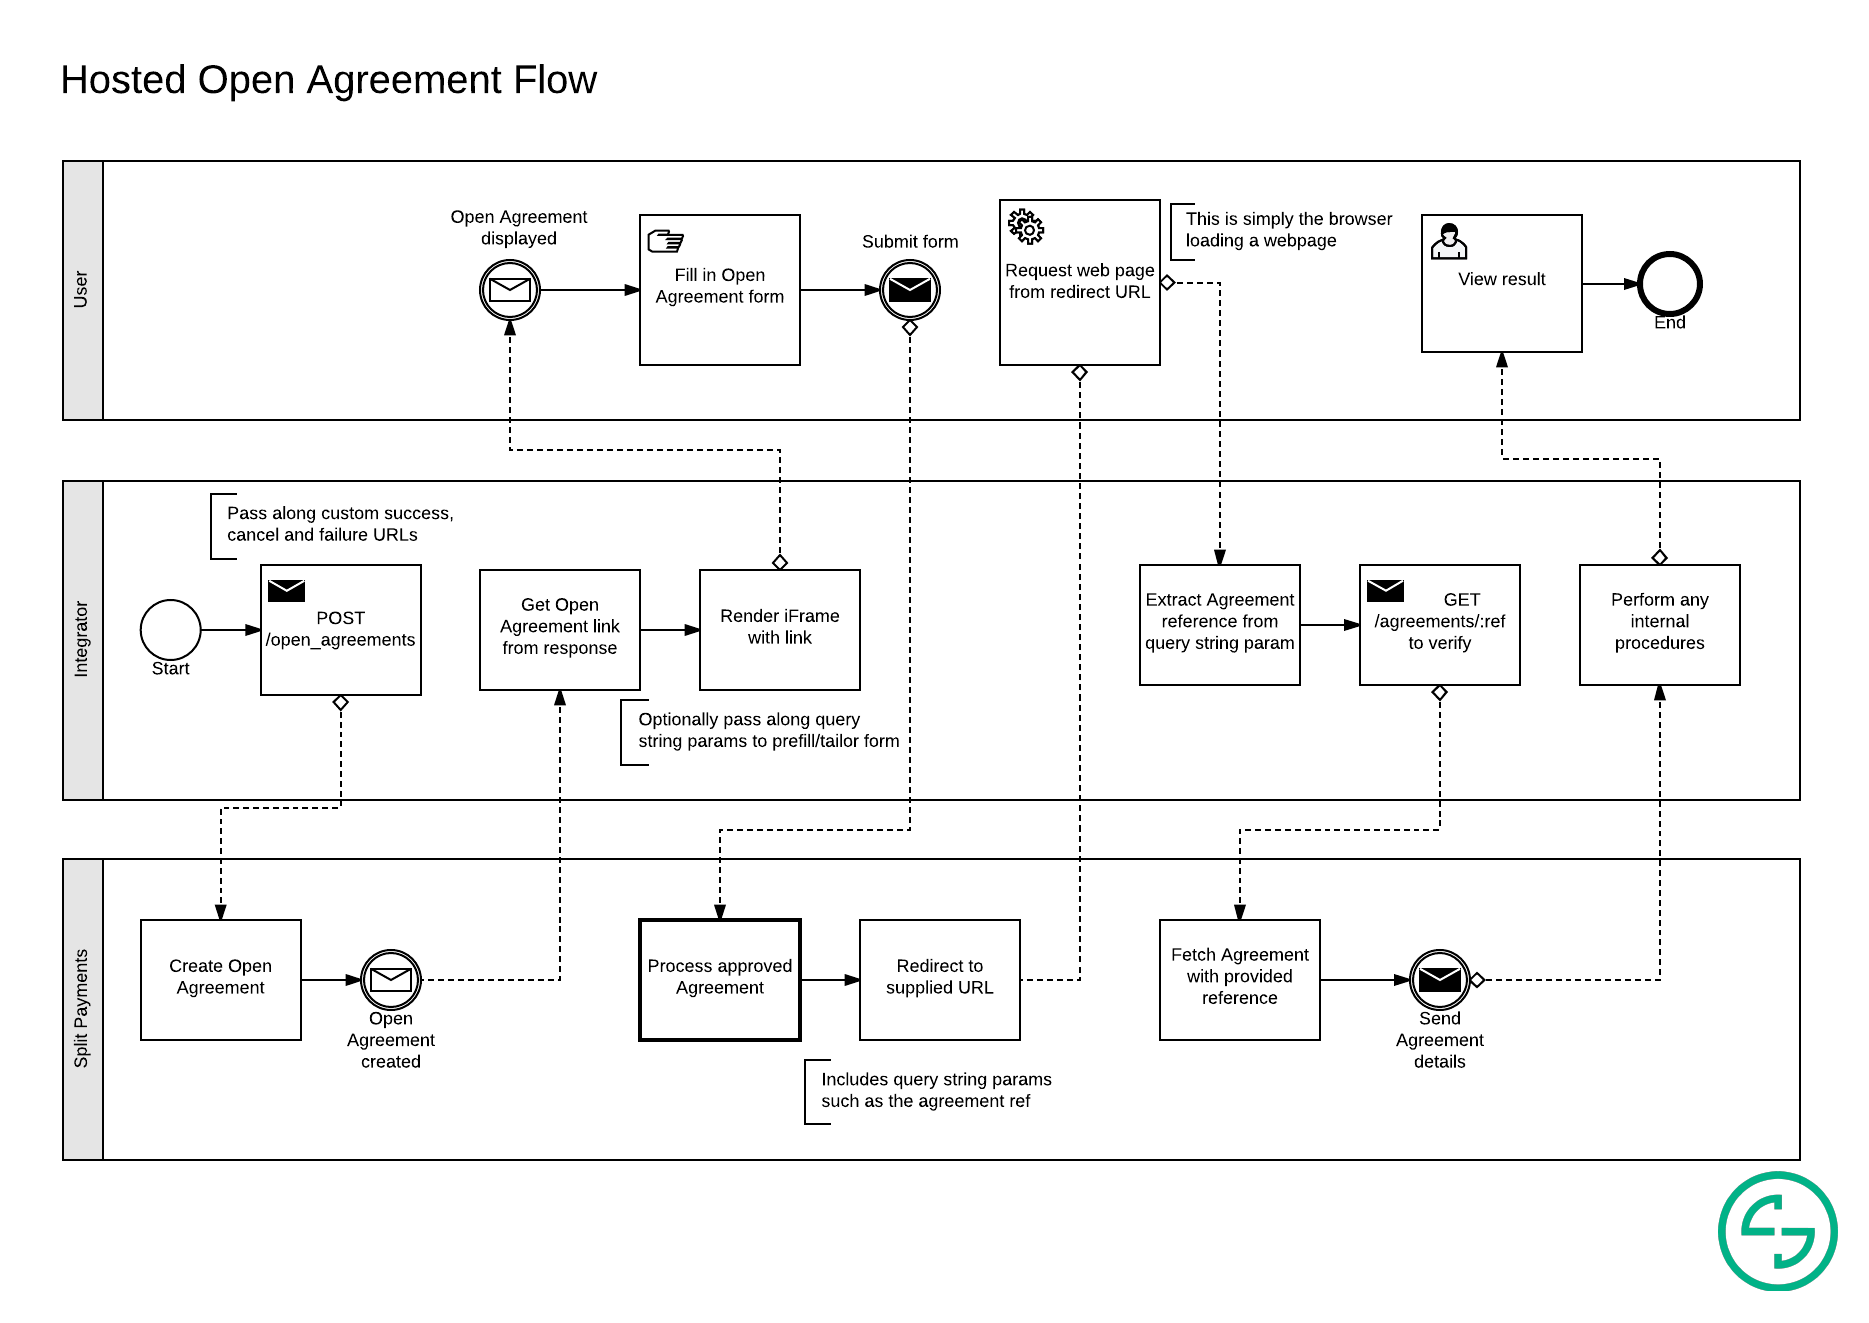
Example flow embedding an Open Agreement link using an iFrame in order to automate future Payment Request approvals:
Idempotent requests
Example response
{
  "errors": [
    {
      "title": "Duplicate idempotency key",
      "detail": "A resource has already been created with this idempotency key",
      "links": {
        "about": "https://docs.zepto.money/"
      },
      "meta": {
        "resource_ref": "PB.1a4"
      }
    }
  ]
}
The Zepto API supports idempotency for safely retrying requests without accidentally performing the same operation twice.
For example, if a [Make a Payment] is POSTed and a there is a network connection error, you can retry the Payment with the same idempotency key to guarantee that only a single Payment is created. In case an idempotency key is not supplied and a Payment is retried, we would treat this as two different payments being made.
To perform an idempotent request, provide an additional Idempotency-Key:<key> header to the request.
You can pass any value (up to 256 characters) as the key but we suggest V7 UUIDs or another appropriately random string.
Keys expire after 24 hours. If there is a subsequent request with the same idempotency key within the 24 hour period, we will return a 409 Conflict.
-
The
meta.resource_refvalue is the reference of the resource that was previously created with the conflicting idempotency key. -
The
Idempotency-Keyheader is required when interacting with endpoints that support it. -
Only the
POSTaction for the Payments, Payment Requests, Transfers and Refunds endpoints require the use of theIdempotency-Key. -
Endpoints that use the
GETorDELETEactions are idempotent by nature. -
A request that quickly follows another with the same idempotency key may return with
503 Service Unavailable. If so, retry the request after the number of seconds specified in theRetry-Afterresponse header.
Currently the following POST requests can be made idempotent. We require sending a unique Idempotency-Key header when making those requests to allow for safe retries:
Error responses
Example detailed error response
{
  "errors": [
    {
      "title": "A Specific Error",
      "detail": "Details about the error",
      "links": {
        "about": "https://docs.zepto.money/..."
      }
    }
  ]
}
Example resource error response
{
  "errors": "A sentence explaining error/s encounted"
}
The Zepto API returns two different types of error responses depending on the context.
Detailed error responses are returned for:
-
Authentication
-
Request types
-
Idempotency
All other errors relating to Zepto specific resources(e.g. Contacts) will return the Resource error response style.
403 errors
403 errors are generally returned from any of our endpoints if your application does not have the required authorisation. This is usually due to:
-
An invalid/expired
access_token; or -
The required scopes not being present when setting up your OAuth application; or
-
The required scopes not being present in the authorisation code link used to present your user with an authorisation request.
Speeding up onboarding
Consider the following scenario:
Zepto is integrated in your application to handle payments.
A customer would like to use Zepto but does not yet have Zepto account.
You already have some information about this customer.
Given the above, in a standard implementation where a customer enables/uses Zepto within your application, these are the steps they would follow:
-
Click on some sort of button within your app to use Zepto.
-
They get redirected to the Zepto sign in page (possibly via a popup or modal).
-
Since they don't yet have a Zepto account, they would click on sign up.
-
They would fill in all their signup details and submit.
-
They would be presented with the authorisation page.
-
They would click the "Authorise" button and be redirected to your app.
Whilst not too bad, we can do better!
In order to speed up the process, we allow query string params to be appended to the authorisation URL. For instance, if we already have some information about the customer and know they probably don't have a Zepto account, we can embed this information in the authorisation URL.
Supported query string parameters
| Parameter | Description |
|---|---|
landing | Accepted value: sign_up. What page the user should see first if not already signed in Default is the sign in page.Deprecated values: business_sign_up, personal_sign_up. |
nickname | Only letters, numbers, dashes and underscores are permitted. |
| This will be used to identify the account in Zepto. | |
name | Business account only. Business name. |
abn | Business account only. Business ABN. |
phone | Business account only. Business phone number. |
street_address | |
suburb | |
state | See the sign up page for accepted values |
postcode | |
first_name | |
last_name | |
mobile_phone | |
email |
All values should be URL encoded.
As an example, the following authorisation URL would display the personal sign up & prefill the first name field with George:
https://go.sandbox.zeptopayments.com/oauth/authorize?response_type=code&client_id=xxx&redirect_uri=xxx&scope=xxx&landing=sign_up&first_name=George
You can also pass the values directly to the sign up page outside of the OAuth2 authorisation process. Click on the following link to see the values preloaded:
https://go.sandbox.zeptopayments.com/business/sign_up?name=GeorgeCo&nickname=georgeco&first_name=George.
Sandbox Testing Details
Example failure object
{
  "failure": {
    "code": "E302",
    "title": "BSB Not NPP Enabled",
    "detail": "The target BSB is not NPP enabled. Please try another channel."
  }
}
Try out your happy paths and not-so happy paths; the sandbox is a great place to get started without transferring actual funds. All transactions are simulated and no communication with financial institutions is performed.
The sandbox works on a 1 minute cycle to better illustrate how transactions are received and the lifecyle they go through. In other words, every minute, we simulate communicating with financial institutions and update statuses and events accordingly.
All 6 digits BSBs are valid in the sandbox with the exception of 100000. This BSB allows you to simulate the adding of an invalid BSB. In production, only real BSBs are accepted.
Failed transactions will contain the following information inside the event:
-
Failure Code
-
Failure Title
-
Failure Details
DE Transaction failures
Using failure codes
To simulate a transaction failure, create a Payment or Payment Request with an amount corresponding to the desired failure code.
For example:
-
DE amount
$1.05will cause the credit transaction to fail, triggering the credit failure codeE105(Account Not Found). -
DE amount
$2.03will cause the debit transaction to fail, triggering the debit failure codeE203(Account Closed).
Example scenarios
- Pay a contact with an invalid account number:
* Initiate a Payment for `$1.05`.
* Zepto will mimic a successful debit from your bank account.
* Zepto will mimic a failure to credit the contact's bank account.
* Zepto will automatically create a `payout_reversal` credit transaction back to your bank account.
- Request payment from a contact with a closed bank account:
* Initiate a Payment Request for `$2.03`.
* Zepto will mimic a failure to debit the contact's bank account.
NPP Payment failures
Using failure codes
To simulate a transaction failure, create a Payment with an amount corresponding to the desired failure code.
For example:
-
NPP amount
$3.02will cause the transaction to fail, triggering credit failure codeE302(BSB Not NPP Enabled). -
NPP amount
$3.04will cause the transaction to fail, triggering credit failure codeE304(Account Not Found).
You will receive all the same notifications as if this happened in our live environment. We recommend you check out our article on what happens when an NPP Payment fails to learn more about what happens when an NPP Payment is unable to process.
NPP Payment channel-switching failures
Using failure codes
To simulate a transaction failure across both NPP and DE channels, create a Payment with an amount corresponding to the desired DE credit failure code. The NPP leg of the payment will fail with error code E303 (this is to facilitate channel-switching where the transaction is set up to do so). If the transaction switches channels the DE leg of the payment will fail with the DE credit failure code that corresponds to the amount.
For example:
-
payment amount
$1.02will fail with codeE303(Account Not NPP Enabled). If the payment channel-switches it will also fail DE processing with codeE102(Payment Stopped). -
payment amount
$1.05will fail with codeE303(Account Not NPP Enabled). If the payment channel-switches it will also fail DE processing with codeE105(Account Not Found). -
payment amount
$1.10will succeed NPP processing, as there is no corresponding DE credit failure code for that amount.
Instant account verification accounts
When using any of our hosted solutions (Payment Requests,
Open Agreements or
Unassigned Agreements) you may want to test the Instant Account Verification (IAV) process where we accept online banking credentials to validate bank account access. To do so, you can use the following credentials:
| Login | Password |
|---|---|
12345678 | TestMyMoney |
NOTE: The credentials will work with any of the available financial institutions.
Configuration
Scopes
Scopes define the level of access granted via the OAuth2 authorisation process. As a best practice, only use the scopes your application will require.
| Scope | Description |
|---|---|
public | View user's public information |
agreements | Manage user's Agreements |
bank_accounts | Manage user's Bank Accounts |
bank_connections | Manage user's Bank Connections |
contacts | Manage user's Contacts |
open_agreements | Manage user's Open Agreements |
payments | Manage user's Payments |
payment_requests | Manage user's Payment Requests |
refunds | Manage user's Refunds |
transfers | Manage user's Transfers |
transactions | Access user's Transactions |
webhooks | Manage user's Webhook events |
offline_access | Create non-expiring access tokens for user |
NOTE: Please use
offline_accesswith discretion, as you'll have no direct way to invalidate the token. Please contact Zepto immediately if any token may have potentially been compromised.
Pagination
Example response headers
Link: <http://api.sandbox.zeptopayments.com/contacts?page=2>; rel="next"

Per-Page: 25
Pagination information can be located in the response headers: Link & Per-Page
All collection endpoints are paginated to Per-Page: 25 by default. (100 per page is max, any value above will revert to 100)
You can control the pagination by including per_page=x and/or page=x in the endpoint URL params.
The Link header will be optionally present if a "next page" is available to navigate to. The next page link is identified with rel="next"
Legacy Pagination: Some existing users may still be on a transitional legacy version of pagination.
The Legacy version returns some extra deprecated header values:
Totalplusrel="last"&rel="prev"inLink.Please transition to only using the
rel="next"from theLinkheader, as all other values are deprecated.
Remitter
Example request
{
  "...": "...",
  "metadata": {
    "remitter": "CustomRem"
  }
}
You can elect to assign a remitter name on a per-request basis when submitting Payments & Payment Requests. Simply append the remitter key and a value within the metadata key.
-
For Payments, the party being credited will see the designated remitter name along the entry on their bank statement.
-
For Payment Requests, the party being debited will see the designated remitter name along the entry on their bank statement.
NOTE: The remitter name MUST be between
3and16characters.
Aggregation
Zepto will automatically aggregate debits that are:
-
From the same bank account; and
-
Have the same description; and
-
Initiated by the same Zepto account.
Likewise for credits:
-
To the same bank account; and
-
Have the same description; and
-
Initiated by the same Zepto account.
Should you prefer debit aggregation to be disabled, please contact [email protected]. Note that additional charges may apply.
Updated 2 months ago